Labs: betas and fun use cases
Welcome to our Labs page! At Demo Gorilla we try to be extra-open about what we’re working on or playing around with.
Please pass along your feedback, we’d love to hear from you!
WIP: Details on Hover
Have a complicated page? We can give you specific talking points for different aspects of the page: Getting detailed talking points when you over over different elements:
This one is something we’re experimenting with, but might not see production. We’d love to hear any and all thoughts though.
WIP: Custom Actions
Custom Actions are a type of action that are built to save you time while you have your client engrossed in your demo. Custom actions take care of the mundane and error prone parts of your demo, like filling out forms, so that you can focus on keeping your client engaged.
Custom Actions do this by allowing you to run JavaScript when you click on the action.
They currently support 2 use cases:
- Making an HTTP request during your demo
- Filling out forms during your demo
Making an HTTP request
Depending on the software that you’re demoing, it can be useful to make an HTTP request to show the result of an event happening outside of your system. Custom Actions makes this a breeze to do. Here’s how:
- Create a new action
- For the “Type”, select “Custom Action”. If you do not see “Custom Action”, let us know and we’ll enable the feature for you.
- In the “Code”, paste the following, replacing
YOUR_WEBSITEwith the website you want to make a request to:
Here, we use fetch to make aconst request = await fetch("YOUR_WEBSITE", {"method": "POST", "body": "lorem ipsum" }) const text = await request.text() console.log(text)POSTrequest toYOUR_WEBSITE. Then, we’ll take the response and log it to the console. - Add
YOUR_WEBSITEto your authorized domains. For security reasons, Demo Gorilla will only send requests to domains that you have authorized. - Open the Demo Gorilla presenter and run your action
- Right click on the presenter window and click “Inspect”
- A new pop up should open. Choose the “Console” tab. You should see the output of the
console.log
You may want to make the request from the demo window instead of the Demo Gorilla presenter. In this case, use the following code instead:
const request = await DG.DemoWindow.request("https://catfact.ninja/fact", {"method": "GET", "Accept": "application/json" })
console.log(request)
DG.DemoWindow.request takes the same parameters as fetch. It’s return value, however, is different. It returns an object with three keys:
status: the status code of the request (an integer)headers: a key-value pair of the headers and header values (an object)text: textual representation on what was returned from the request (a string)
Filling out forms
To fill out a form, you first need to be able to uniquely identify the element (typically, an input box) you want to type into. The id of an element is ideal but you might not always have an id on every input box. In these cases, name or another attribute will also work. You can find out all the the attributes of an element by right clicking on the element and selecting “Inspect”.
In the example below, name, id and placeholder are all attributes of the input and can be used to identify this element
<input name='query' id='query_id' placeholder='Search for an x' >
Once you are able to uniquely identify the element, here’s how you can automate filling out forms
- Create a new action
- For the “Type”, select “Custom Action”. If you do not see “Custom Action”, let us know and we’ll enable the feature for you.
- In the “Code”, paste the following, replacing
YOUR_WEBSITEwith the website you want to make a request to:
Here, we are usingawait DG.DemoWindow.type("input[name='query']", "Lorem Ipsum")DG.DemoWindow.type. The first parameter is a CSS Selector, which uniquely identifies the element you want to type into. If there are multiple elements found with that selector, we’ll choose the first element. The second parameter is the text we want to put inside it. - Open the Demo Gorilla presenter and run your action. If everything worked right, your input should have “Lorem Ipsum” written in it.
Debugging
Custom Actions run within the Demo Gorilla presenter. To debug a custom action
- Open the Demo Gorilla presenter
- Right click anywhere inside the presenter window
- Select “Inspect”
- Click on the “Console” tab
console.log messages and error messages should appear in this console.
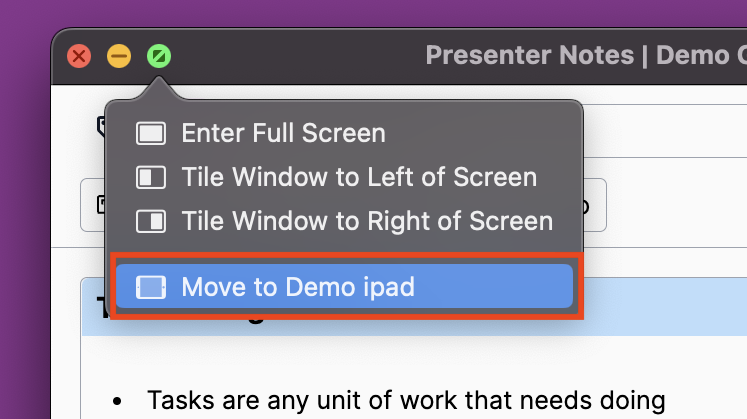
Example: In-person demos on an iPad
If you find yourself giving an in-person demo, either at a prospect’s office or at a conference, you can use an iPad as a second screen via “Sidecar”
If your setup meets the Sidecar system requirements you can send the Demo Gorilla extension to the iPad.
Tips:
- Make sure both your laptop and the iPad have all the updates installed
- Using actions require an Apple Pencil although talking points do not
- Side car is really designed to be a static second screen, you may run into some rough edges
Example: Discovery via drawing on an iPad
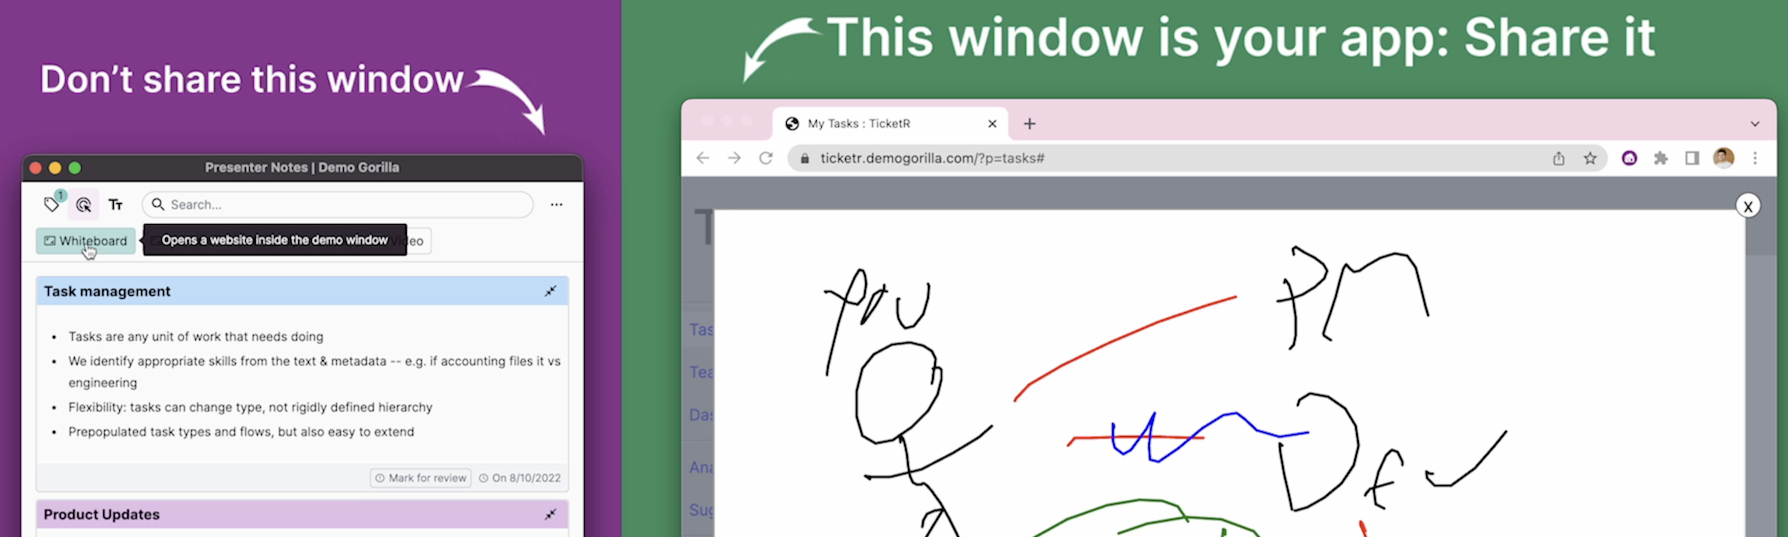
Often the best discovery conversations happen by surprise and being able to sketch out the discussion can be valuable. If your company uses a shared whiteboarding tool, you can embed it in your demo via an action.
This works with all tablets, most smartphones and even a different person on the call from a different machine.
If you don’t have a shared whiteboard tool, you’re welcome to fork the one I wrote on Glitch. Note: if you don’t have a paid account, it’ll go to sleep and take a minute to wake up when you want to use it. You can play with it here.
Want a better drawing tool? Try https://beta.tldraw.com